He has made everything beautiful in its time. Also, he has put eternity into man’s heart, yet so that he cannot find out what God has done from the beginning to the end. – Ecclesiastes 3:11
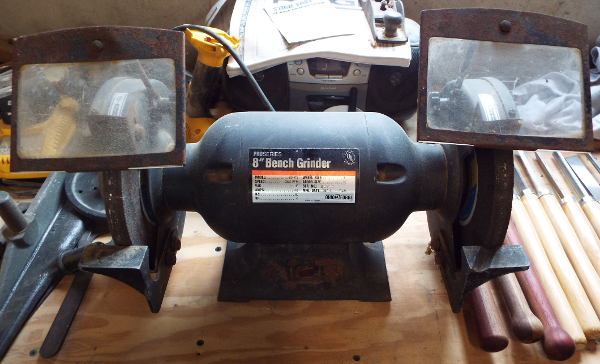
8″ GrinderThe Thursday before Independence Day a post popped up on the local Facebook group about a tool sale. Always interested in a good deal on tools and the fact it was just a couple miles down the road I hopped in the truck to see what was there. There were some nice tools, in fact I picked up an eight inch grinder. What really caught my eye while looking around was the neatly stacked firewood behind a number of tools in the barn. From the ends I could see that a number of pieces of maple were spalted. And several pieces seemed like they would produce enough wood to be usable in smaller projects. Especially pens which Elizabeth has been showing a lot of interest in turning. The woman (and her son) who were selling the tools graciously allowed me to buy some of the pieces of firewood and I loaded them up into the back of the truck.
Spalted Maple Firewood
I brought in a couple pieces of the wood into the shop. Since I don’t have a moisture meter I figured I would try a couple of the pieces and see how they react. I didn’t want to cut up everything and find out they all curl and twist. It turns out it is a good thing I didn’t go too wild milling it all up as there is still enough moisture in the wood that it will cup and twist as it dries. Though there are a couple tricks to deal with that, like microwaving the thinner pieces at lower powers for a while.
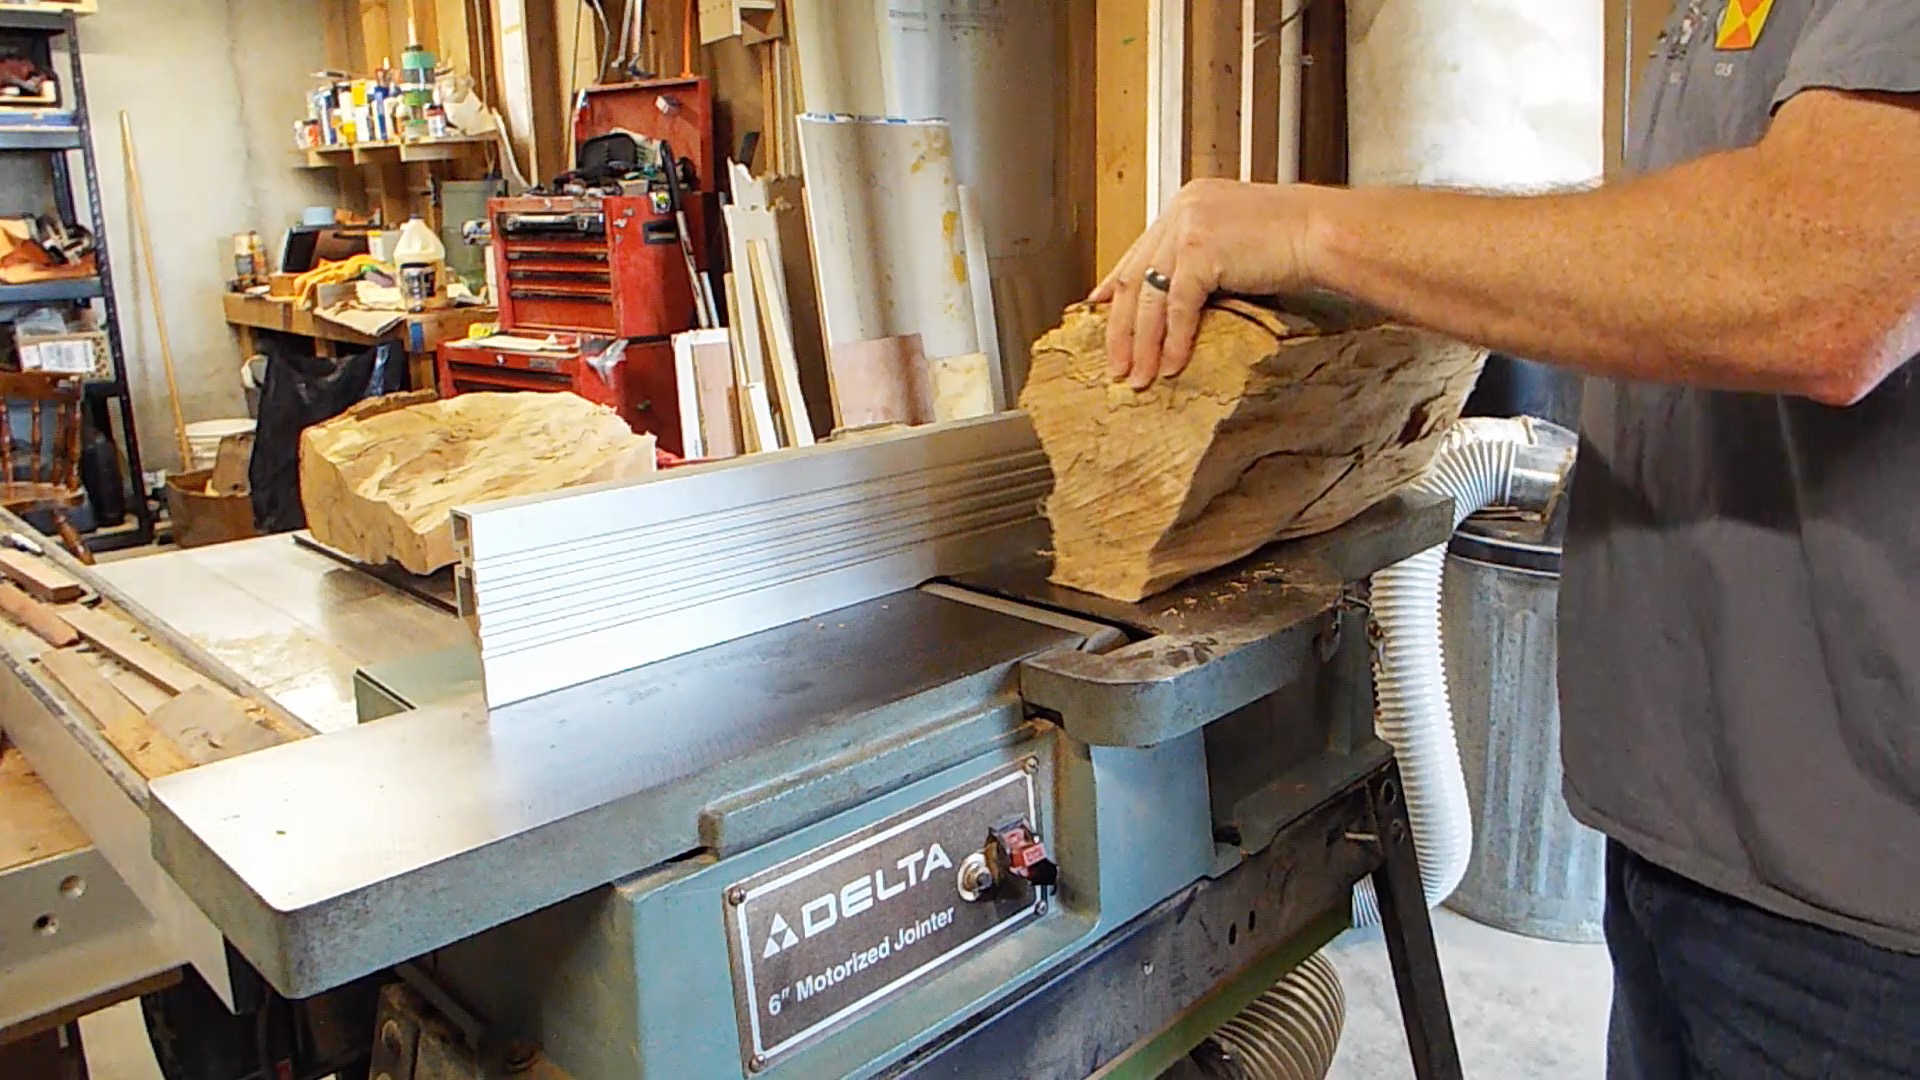
Firewood on the Jointer The first step to milling is getting a couple decent reference edges. For that I brought the wood over to the jointer and removed the blade guard. This is not suggested behavior, but I’ve found when more or less free-handing like this the guard just gets into the way. I started with the heartwood and holding the log so the outer part of the log was mostly level to the bed of the jointer. Next I needed a reference edge 90º to the bottom and rotated the log. This edge does not need to be the entire edge as it is only going to be used as a reference surface on the bandsaw table in the next step. Rough Reference Edge So rather than removing a ton of extra material as wood chips I will still get a decent portion of the log as usable material. Trying to minimize waste is essential to getting the most usable lumber out of the logs.
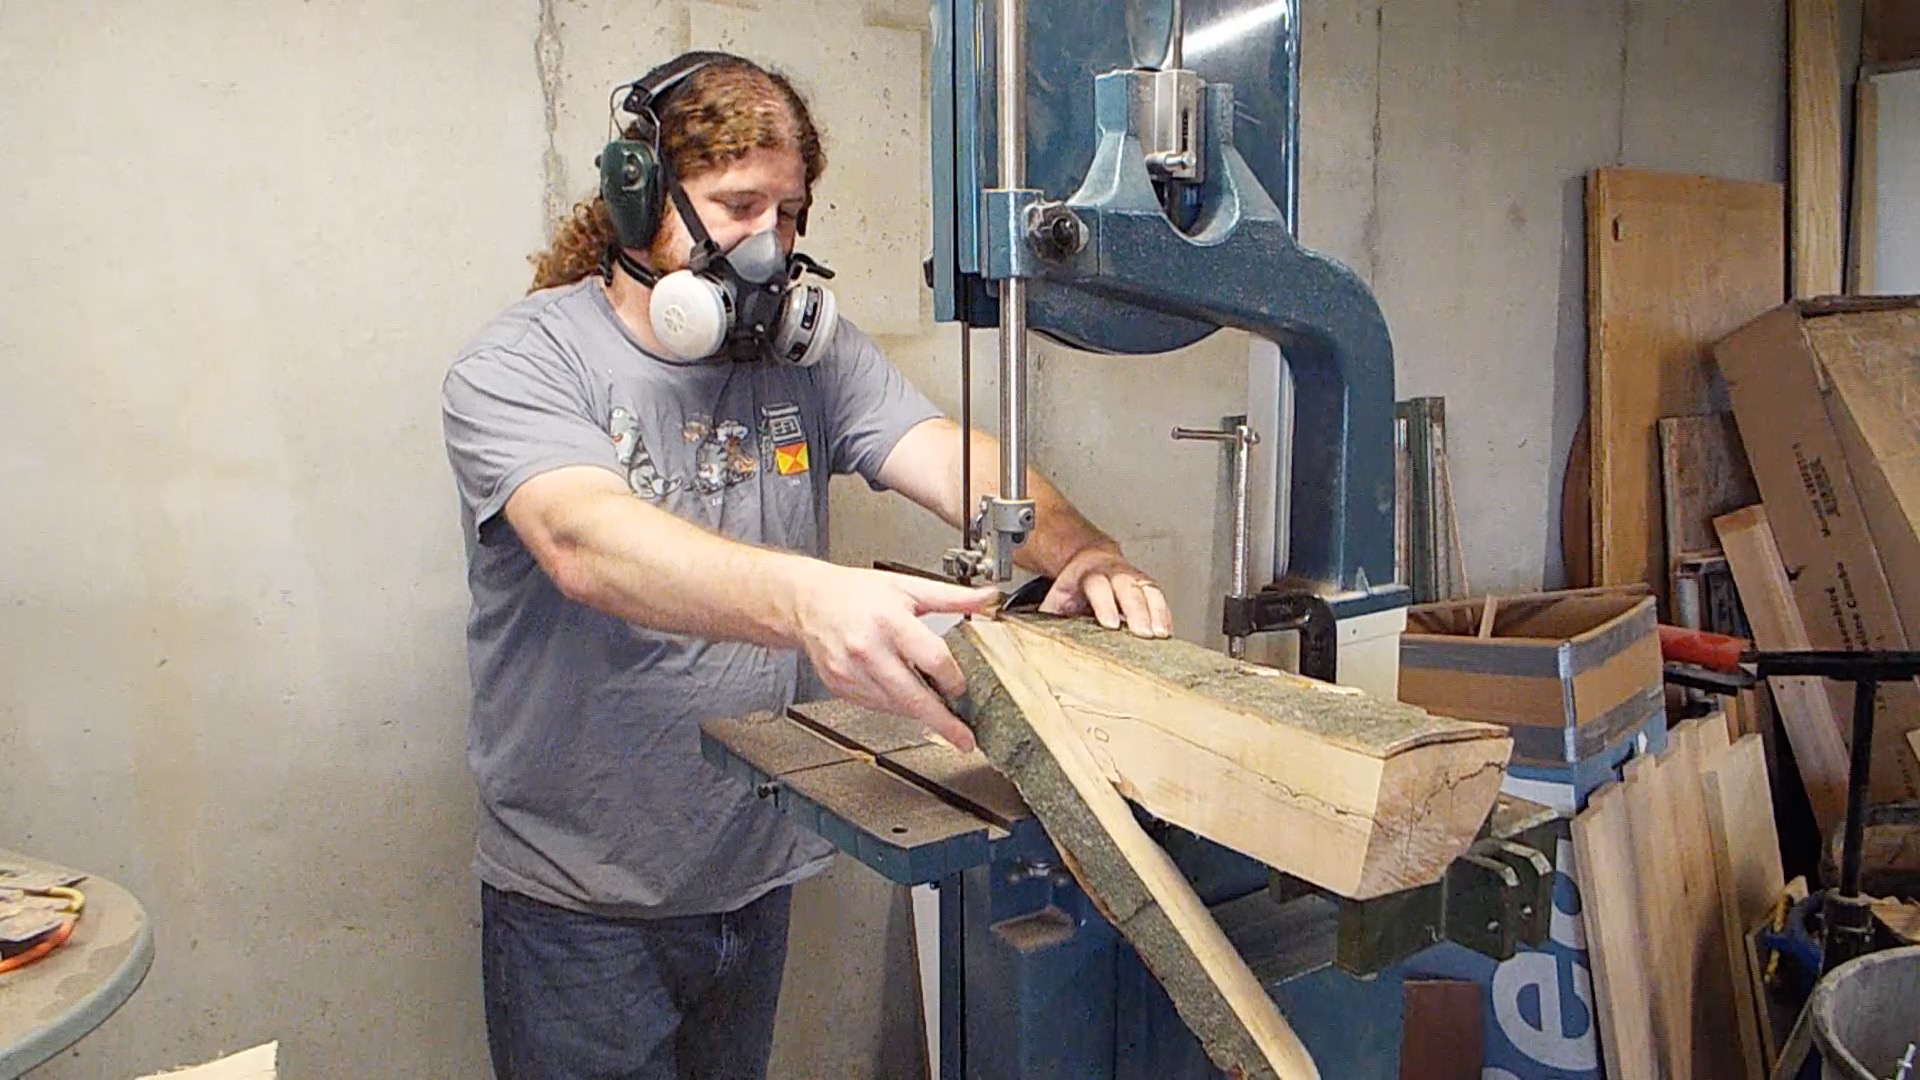
The heartwood of the log does not have any spalting through it so it really isn’t as desirable for my purposes. If you were going to be milling up some wood that you would otherwise not have access to or wanted more of the wood, you could obviously choose to skip this next step. I removed the heartwood by cutting with the log on the rough reference edge on the surface of the bandsaw table. This left me with the remainder of the log having quite a bit of spalting throughout.
Ripping Parallel Edges I then turned the log 90º to rip the rough edge parallel to the partially cleaned up edge from the jointer. This revealed what I figured would be the case, that a line of spalting would separate the darker heartwood of the tree from an outer lighter sap wood which head been weakened from the mold colonies. I could see some of that along the ends of the logs, but it was nice to see that it would carry through both edges.
Removed Bark Edge Removing the bark edge is the next step. This worked out really well since I had tried to make the bottom about as parallel as possible to the outer edge of the log. Since the sap wood was quite a bit softer, not quite to the punky state that some spalted wood gets, it cut very easily. The rest of the cuts I went nice and slow with to get the best cut I could manage, this one was about half the time. The outer edge did not show much of the lines of the mold colonies. This makes sense since the edges will likely not be near the surface of the log.
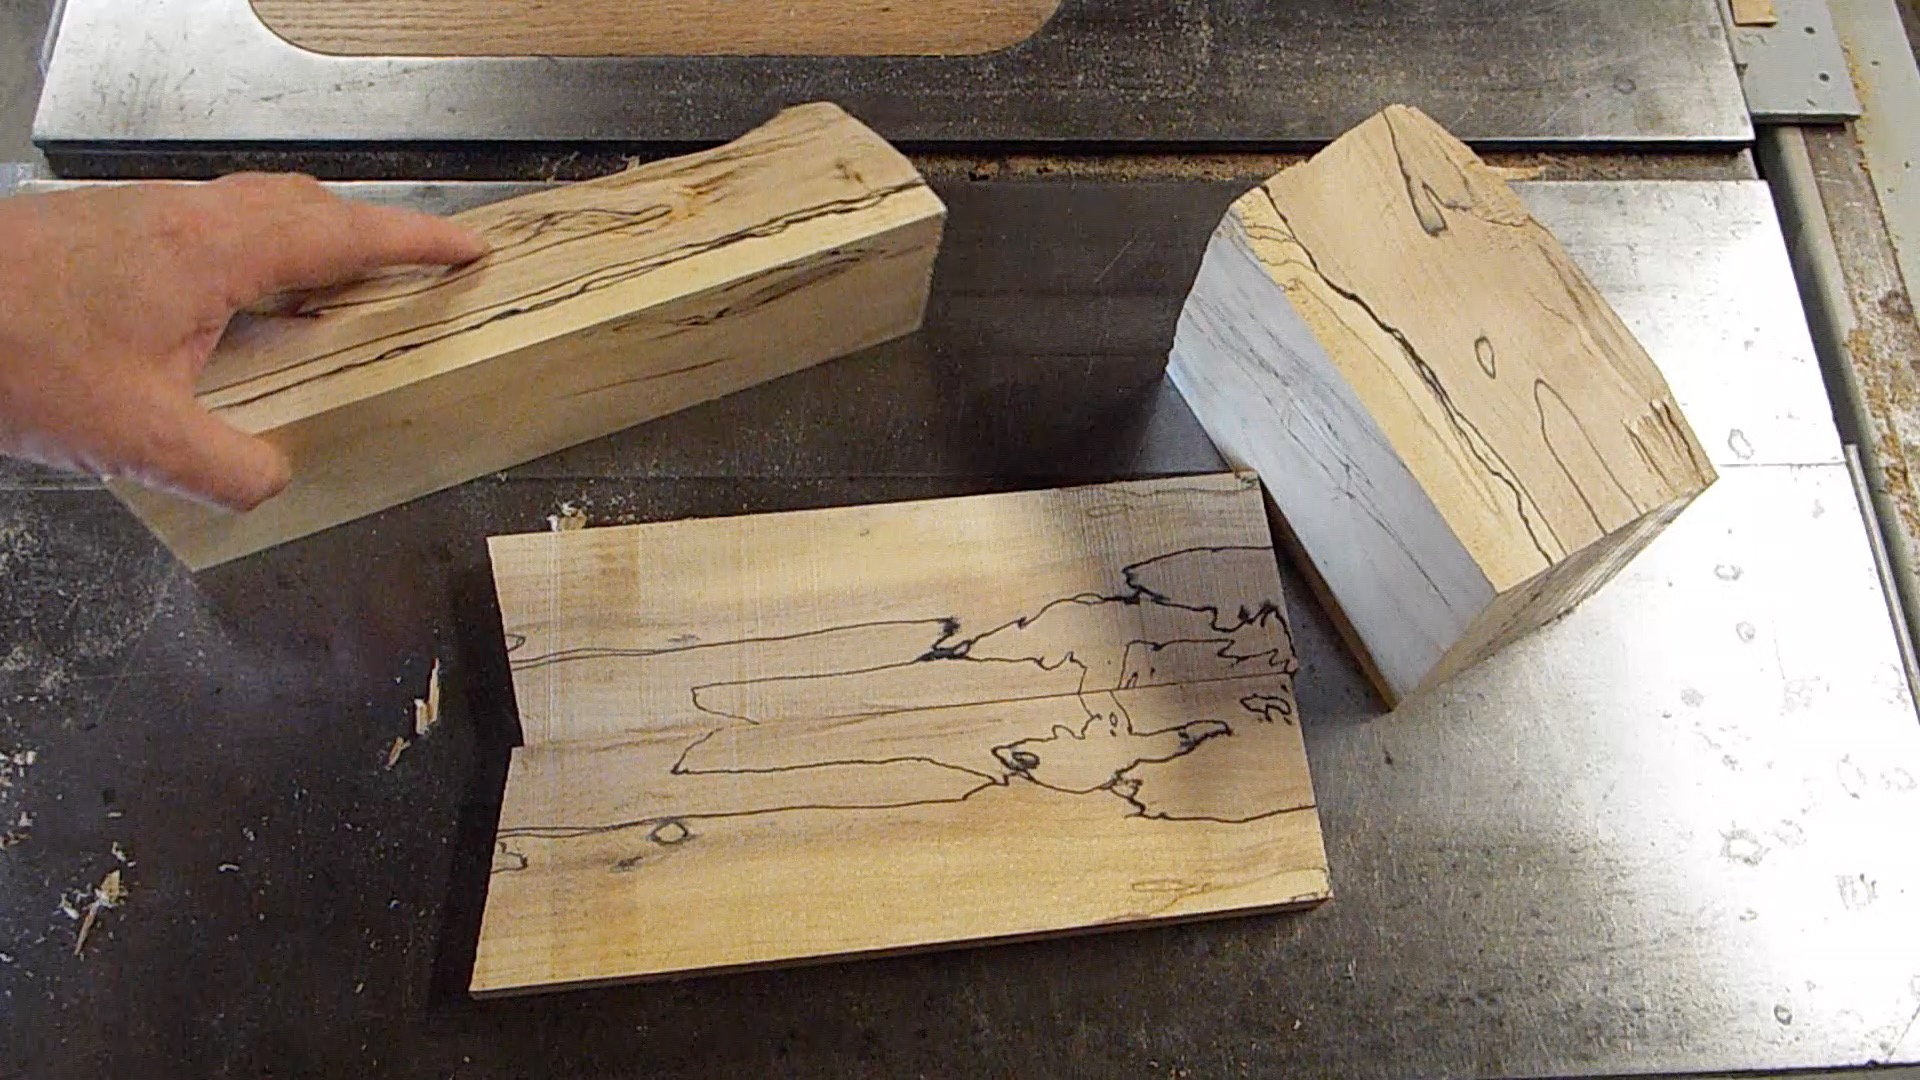
At this point I have a four sided square log. One of the tougher parts of this step is trying to imagine what you might find within the wood. In my case I took one of the edges and cut about a 5″ portion off the end with the miter saw to make a small bandsaw box. With the remaining section I ripped two small boards about 7/8″ thick in a quarter sawn fashion. This gave me the two book matched pieces which I will turn into a pen box. Additionally I left another piece together which was a couple inches square and about 9″ long, which I will probably try turning either a goblet or candlestick. Some additional pieces were used to make pen blanks for my wife to make some pens.
Hello. I’ve owned an Axminster Hobby Series HBS200N bandsaw for the last several months, and generally use it for shaping out curved templates in softwoods and plywood. I’ve been mainly using the original blade provided with the machine for the curved cutting, which is a 6mm, 6 TPI blade. So far, so good! Earlier today, while cutting a fairly gentle curve in a 30mm thick piece of pine, the blade snapped (not at the weld). Do you have any suggestions as to whether a different blade would be more appropriate for this type of work?


Hello. I’ve owned an Axminster Hobby Series HBS200N bandsaw for the last several months, and generally use it for shaping out curved templates in softwoods and plywood. I’ve been mainly using the original blade provided with the machine for the curved cutting, which is a 6mm, 6 TPI blade. So far, so good! Earlier today, while cutting a fairly gentle curve in a 30mm thick piece of pine, the blade snapped (not at the weld). Do you have any suggestions as to whether a different blade would be more appropriate for this type of work?