You cause the grass to grow for the livestock and plants for man to cultivate, that he may bring forth food from the earth and wine to gladden the heart of man, oil to make his face shine and bread to strengthen man’s heart. – Psalm 104:14-15
With Aaron’s help, I made a video about the making of a batch of hard cider. It can be found on YouTube. I’ve added some notes on the cider making process below that wouldn’t fit in the video.
After adding the yeast, I realized that I’d forgotten to add the pectic enzymes. This helps the pectin in the cider to settle and makes for a very clear batch of cider. Without it, this batch of cider is a little cloudier than previous batches of cider I’ve made. However, the cranberry juice I added makes it so it really isn’t noticeable, and since there is no taste difference, I don’t miss it in this batch at all.
I really like the addition of the cranberry juice. It adds a brightness to the cider that I really enjoy.
Sanitizing is done every time the various containers and tools are brought out. I didn’t show all of it in the video, but make sure to sanitize something before you use it. Every time.
It seems I didn’t add enough potassium sorbate after all. If you look on the counter at that point in the video, you can see the potassium sorbate I spilled everywhere. I did add more after I spilled, but I seem to still have undershot. After sitting for a few weeks, some of the bottles are very carbonated. One was to the point that just opening it made cider shoot all over the table and me.
Make sure to look up the amount you should be adding if you make cider with real fermentable sugars. To avoid this problem altogether, xylitol is usually used because it will not ferment. However, xylitol does not agree with me in anything over very very small amounts, so I’m trying to avoid using it at this point.
The clip at the end of the video is entirely Aaron’s fault. :)
You have put more joy in my heart than they have when their grain and wine abound. – Psalms 4:7.
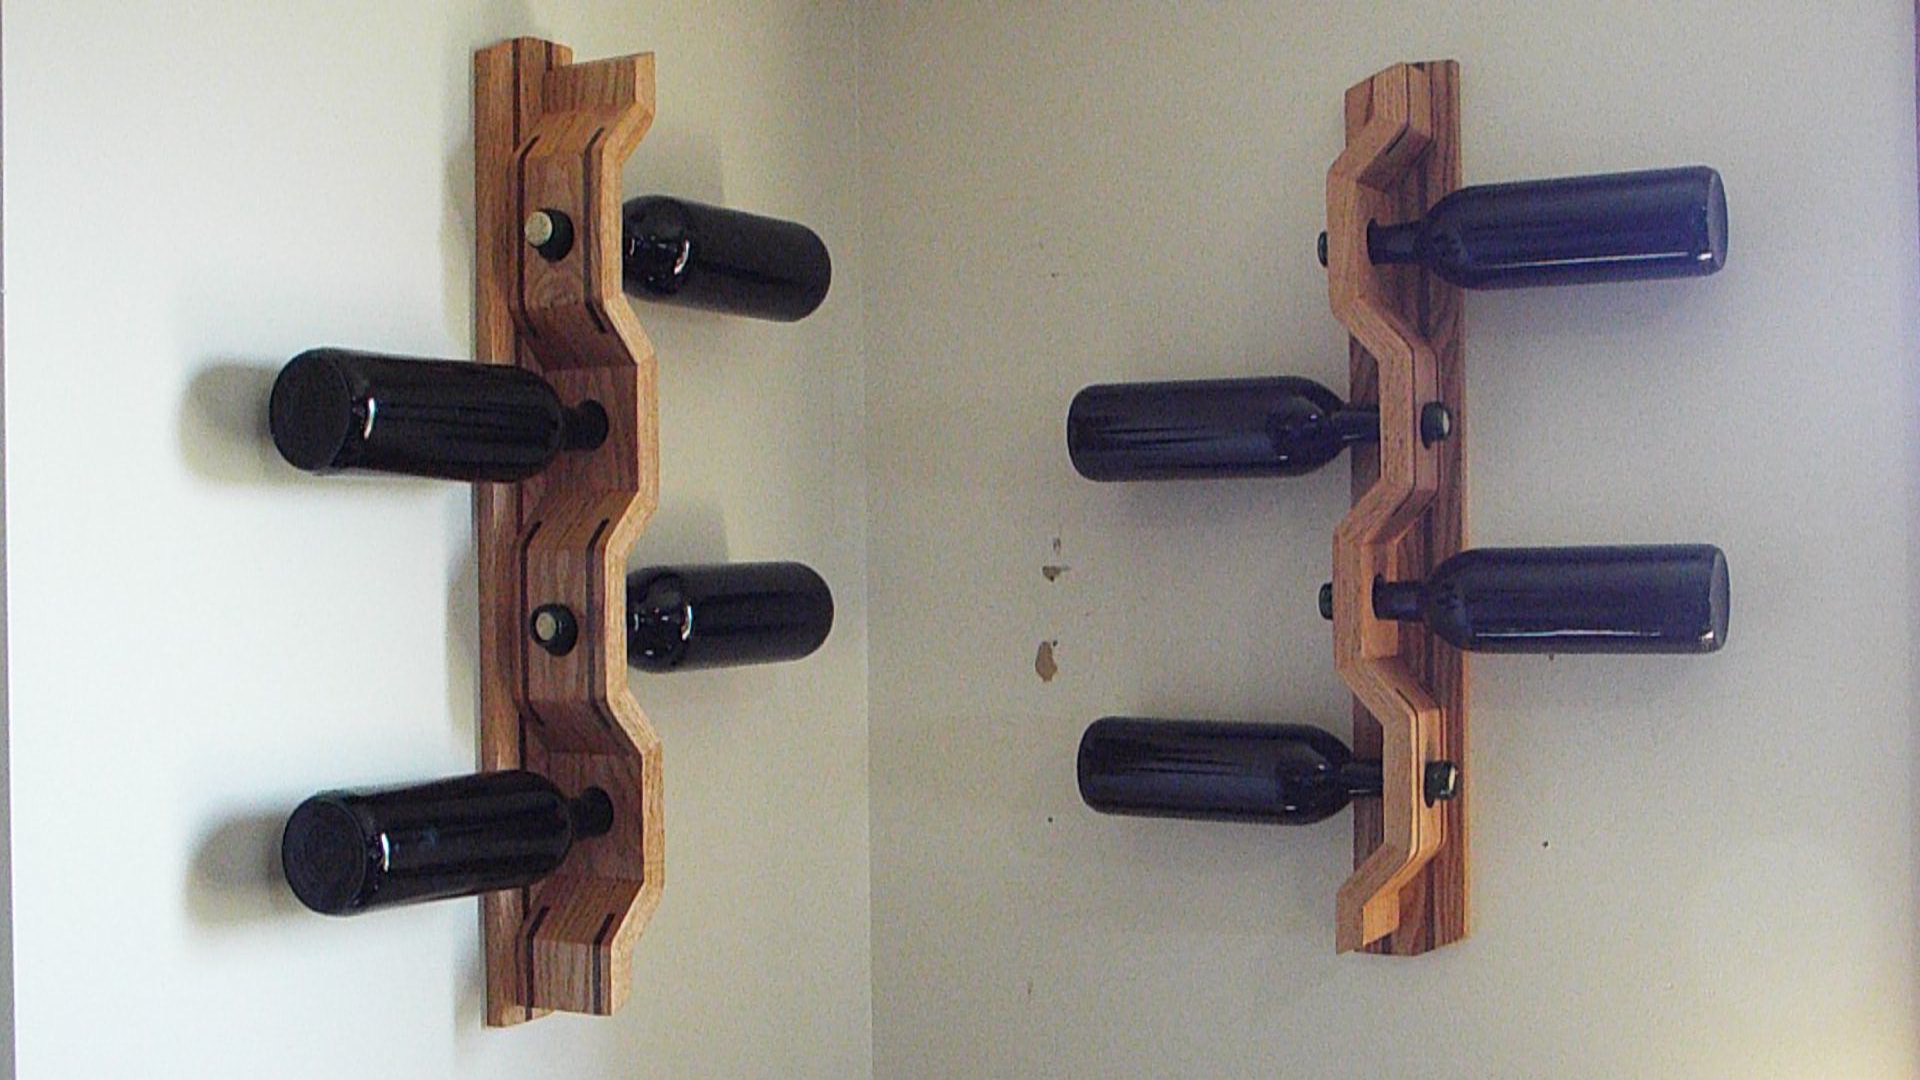
This last Christmas my folks picked up a wine kit for my wife. Right after the New Year she started a pinot noir blueberry. Last month she wound up with 29 bottles! It seemed like it would be a good idea to make some wine racks to give her a way to display her wine.
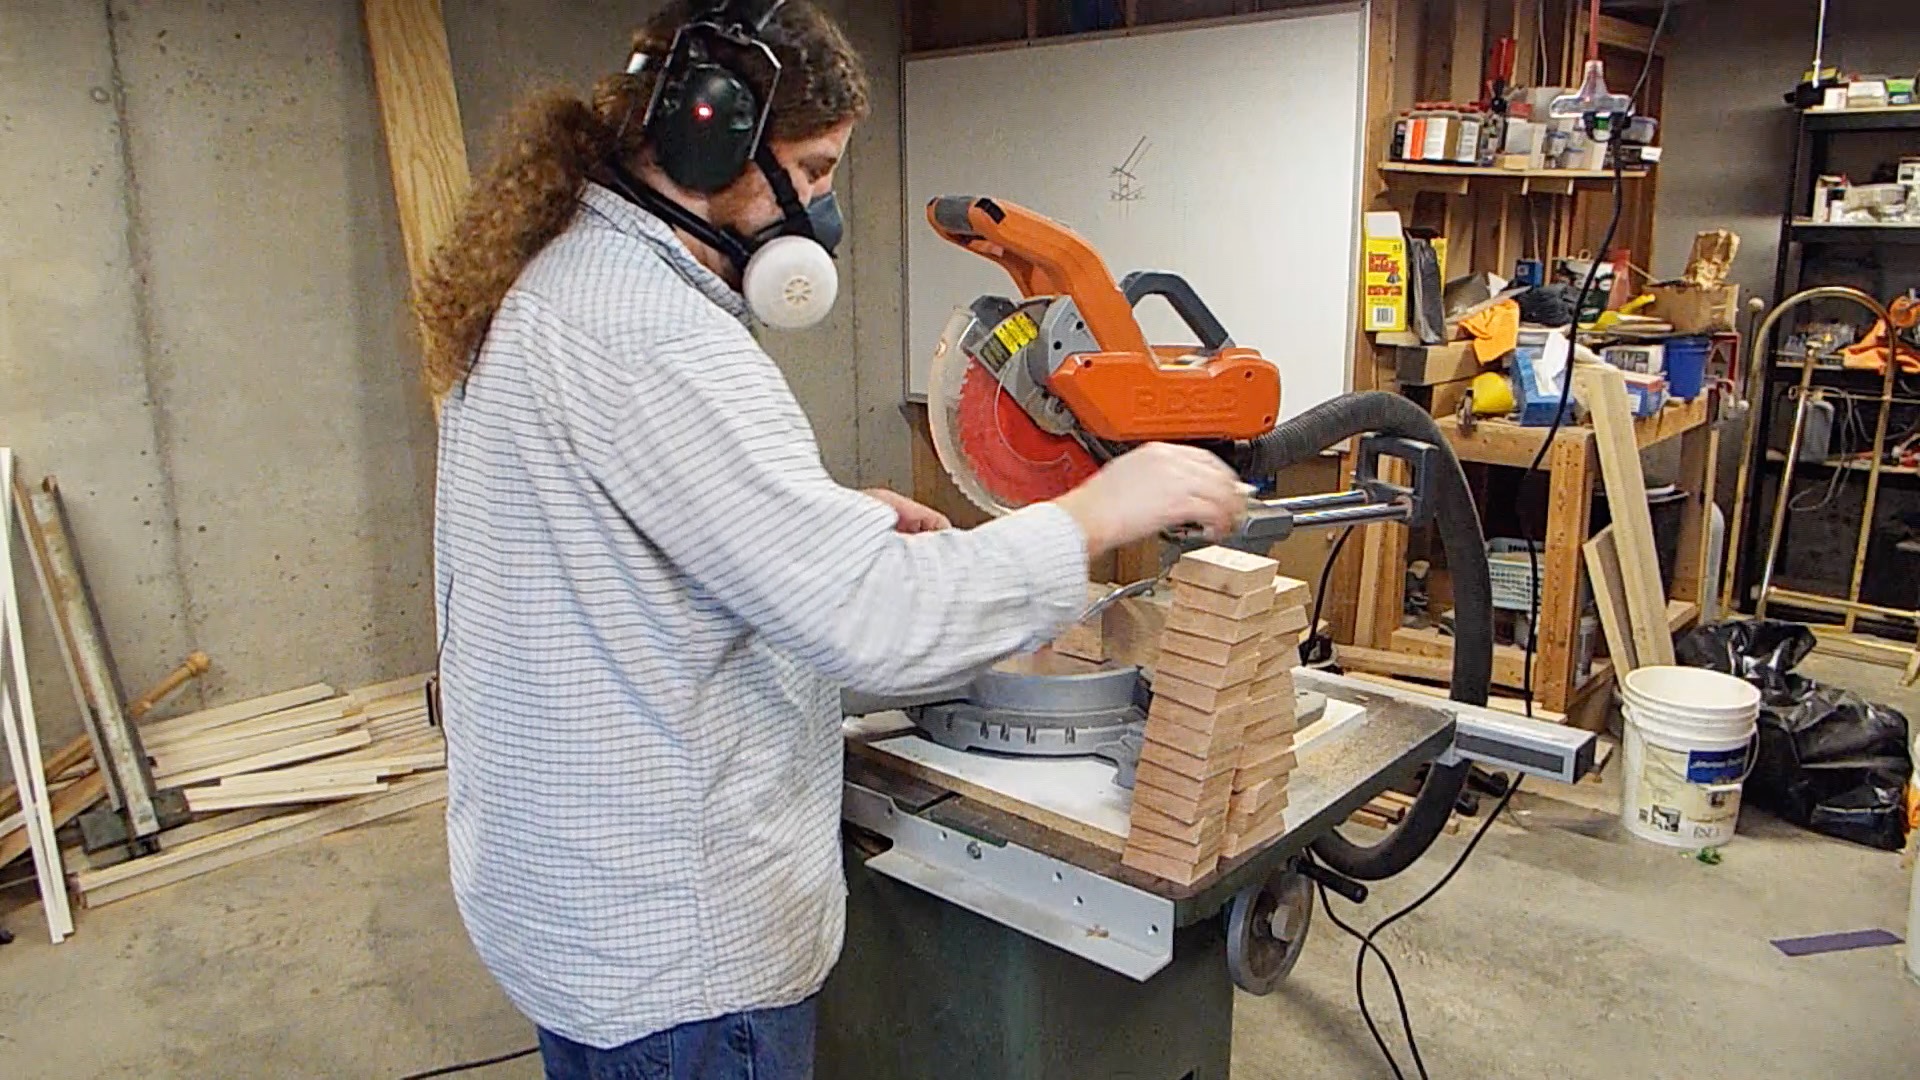
I started by going through the stack of wood in the machine room looking for some pieces I could get some clear sections out. I used the miter saw to cut out the knots. Those pieces were then face jointed and then planed to about 3/4″ thickness. Then a single edge was jointed so I had a good edge to run on the table saw for ripping to width. I ripped the main piece about a half inch wider than the bottles Elizabeth had used for her wine.
Components for the Wine Racks stacked next to the miter saw.
The wine rack is composed of 3 basic components, a wide trapezoid which would have the hole for the bottles, parallelogram pieces which would offset the bottle holders, and then smaller trapezoids which would be the tip and bottom of the rack. On the miter saw I set the angle to 22.5º. A stop block was setup for the for each of the cuts. I did all the cuts for each of the pieces batched together and would reset the block for the next piece.
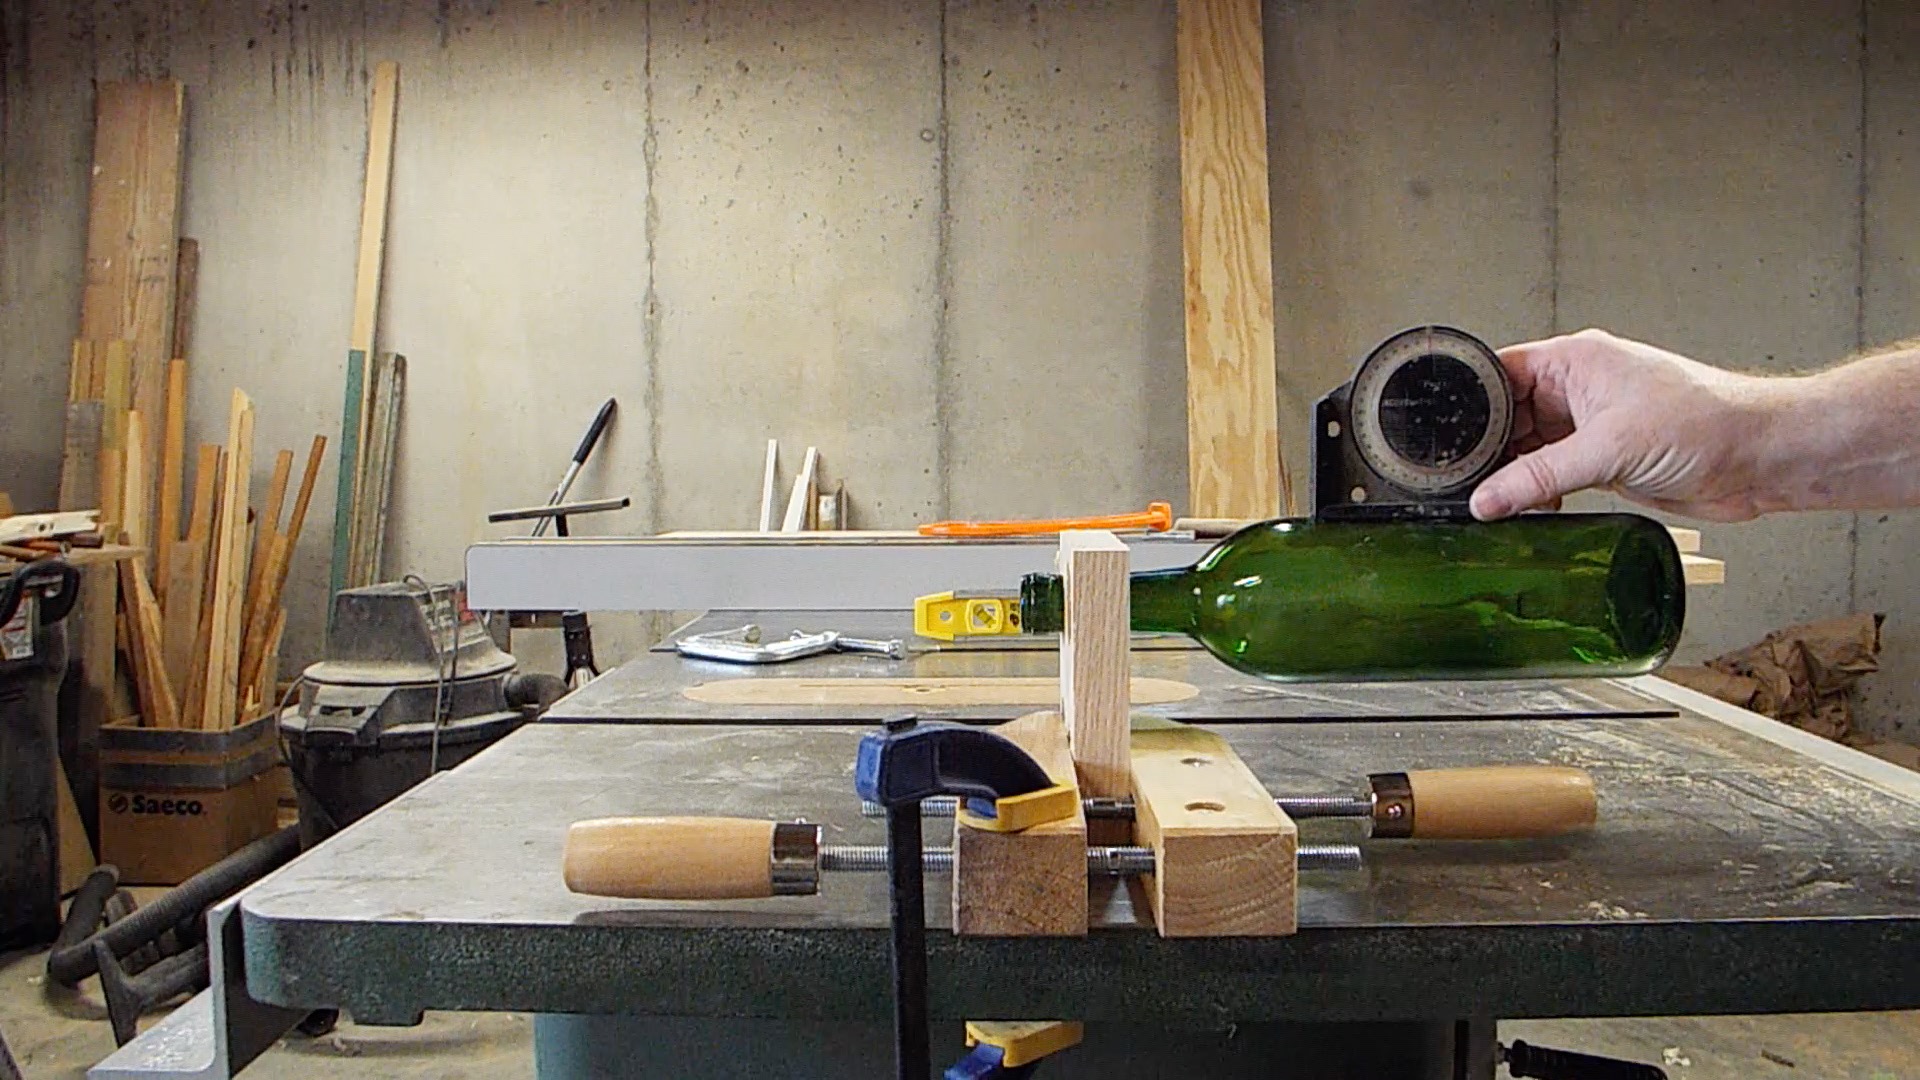
I did some research and the only consensus I could find was that the cork needed to be wet. Some folks suggested a 5º incline was necessary for optimal and other that minimizing the surface area to reduce oxidization. Though I think most of that is some wine snobbery poking through in the guise of science. I figured a horizontal orientation was going to be sufficient.
The bottle is horizontal after the hole has been drilled at 16º.
I then had to figure out the logistics of holding the wine bottle. A little trial and error found that a 16º was required to get the bottle level with the properly sized hole. This was done by finding that the bottle was roughly off by that amount when I drilled the hole at 90º. To verify this I used a temporary jig to drill at 16º. When that checked out I made a permanent jig which mated with the same 22.5º angle which the cuts would wind up being at. I was able to batch off each of the bottle holders at the drill press.
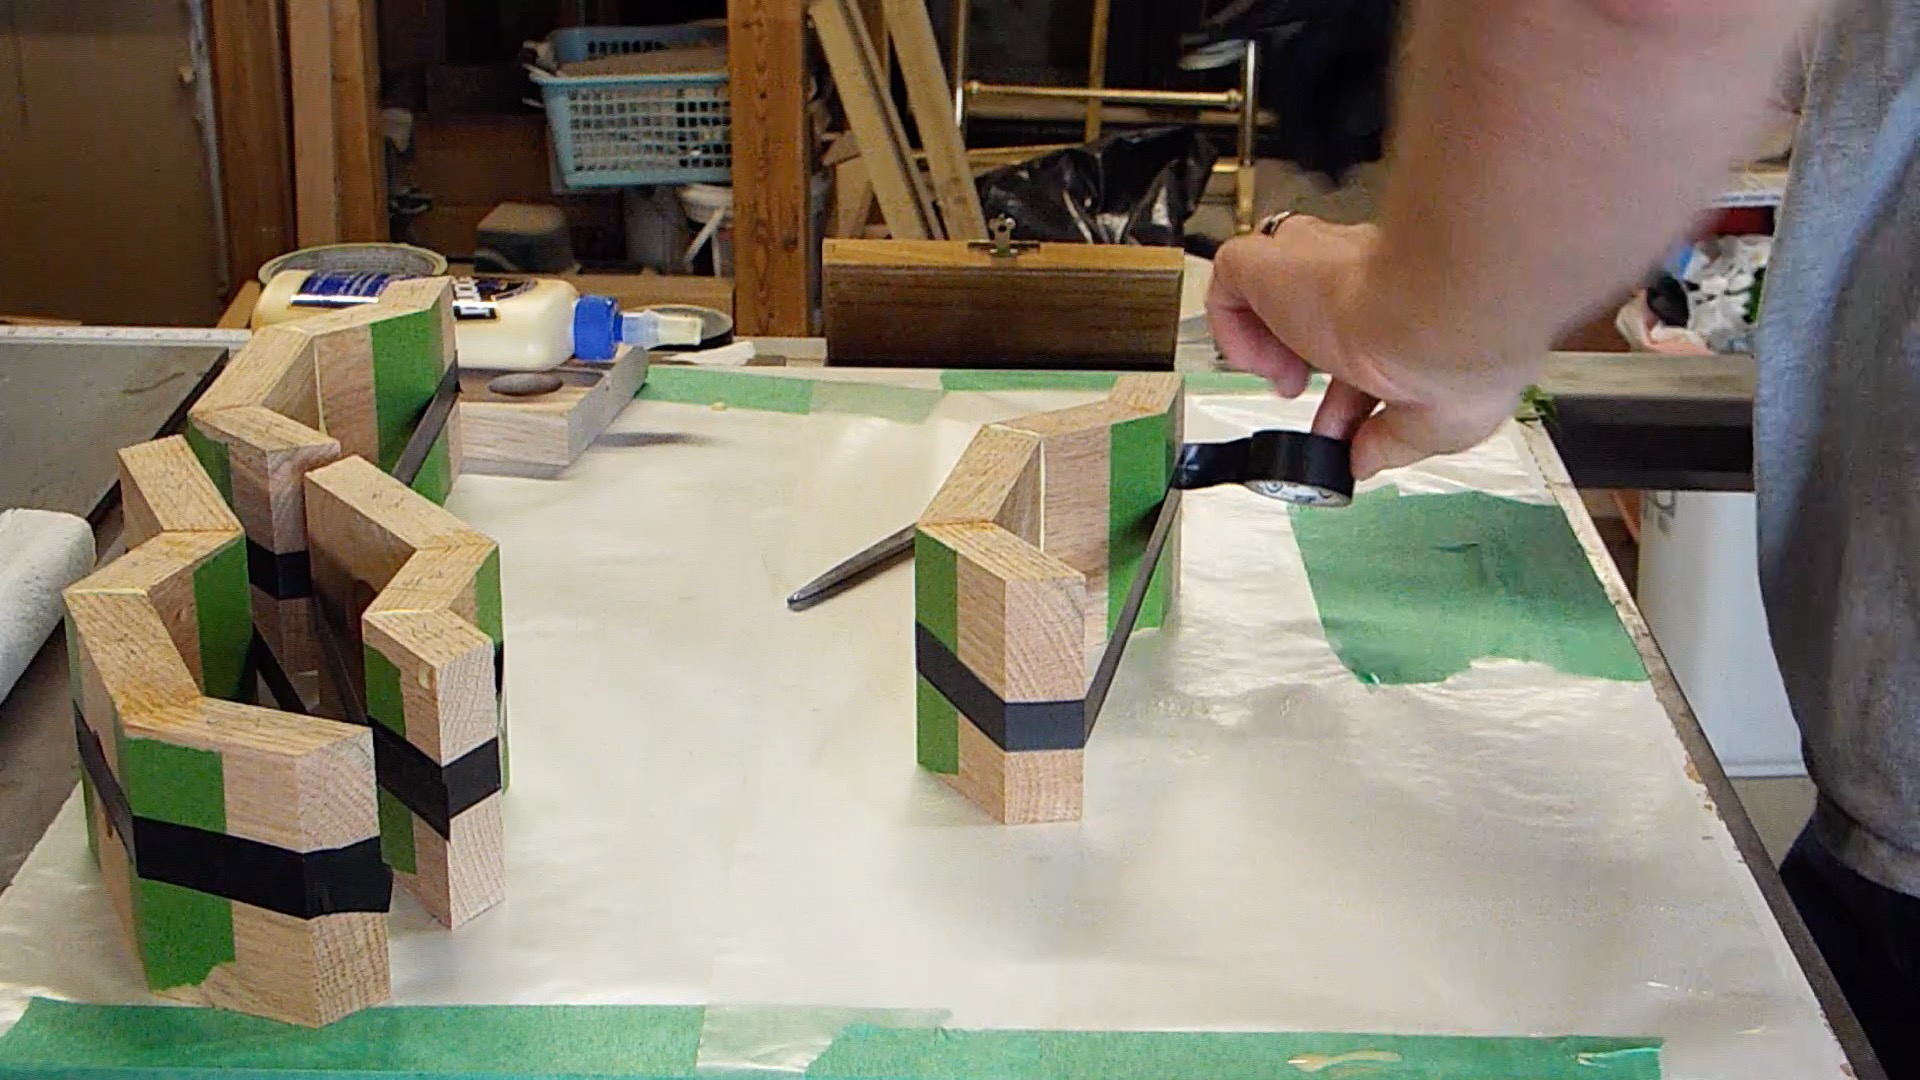
Glue up using the miter tape technique and electric tape as the clamping pressure.
I used the tape technique which is used to glue up miters, putting tape on the outside of the joint and adding glue. Then the joint is pulled together, which I used some electrical tape. The tape had enough stretch to it to provide enough clamping power. Though the glue up was slow going since I had to only do a single joint at a time, since each joint pulled the opposite direction.
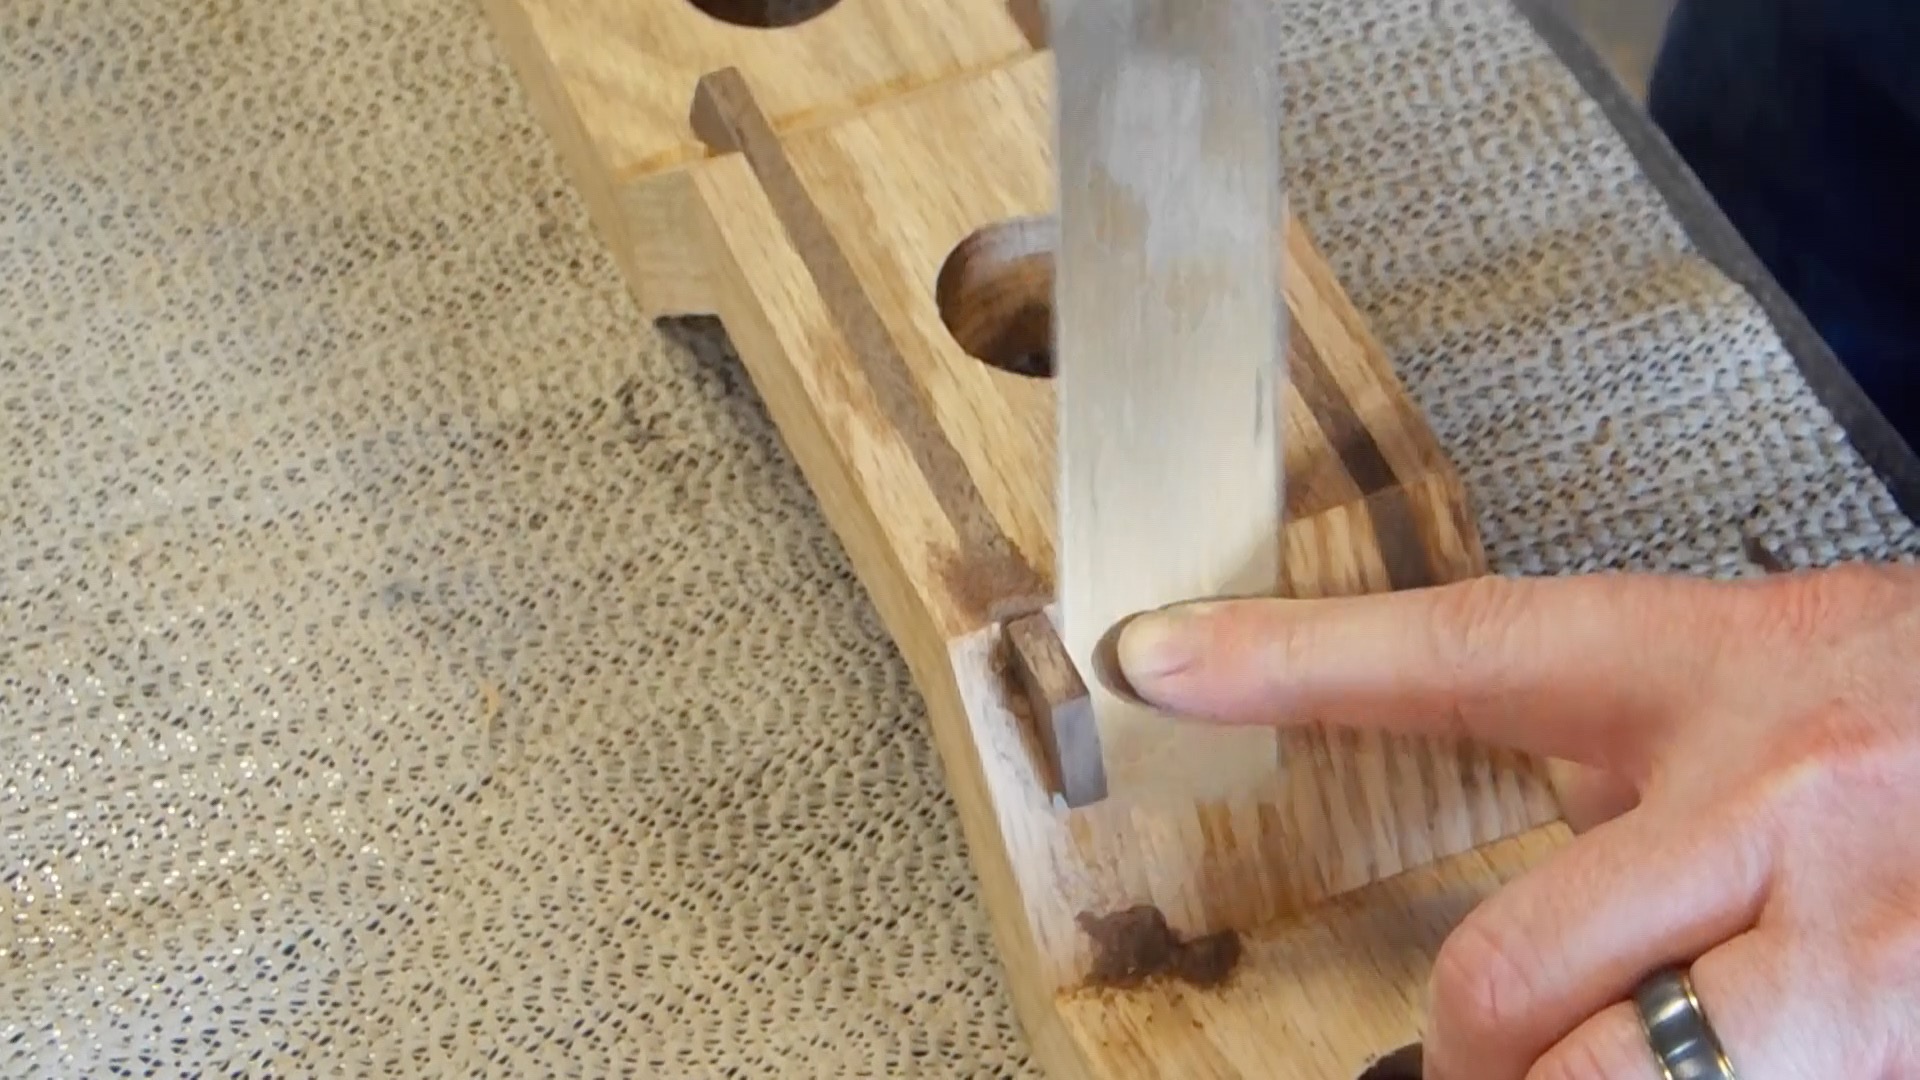
Since all the joints were effectively butt joints I figured splines were necessary to reinforce the joints. I ripped some walnut down to about a 1/4″ for material to use as splines. I then took a measurement off the spline material and setup the dado stack to be just shy of that measurement. This allowed me to finesse the splines to exactly the right size on the belt sander. Glue was applied inside the dados and the splines were slid in. Using cauls each spline was clamped.
The splines having their ends removed after being planed flat. Once the glue was dry I used a block plane to bring the splines flush with the rest of the rack. A flush cut saw was used to trim the ends of the splines to the surface of the angled pieces of the rack. At that point the rest of this part of the rack was sanding. The palm sander was used for the most part, but a certain amount was necessary to do with hand sanding. I used the smallest drum from my drill press drum sander to cleanup the holes for the wine bottles.
The backs were a simple glue up of oak with a couple walnut slats. These were then face jointed and planed to thickness of about 3/8″. These were then squared up on both ends, about a 1/2″ larger in each dimension of the rack component. Then the ends were partially trimmed to the same angle as the top and bottom of the rack at 22.5º.
The racks were attached to the backs by pre-drilling the back and recess. These were clamped onto the rack and the rack itself was pre-drilled to keep it from splitting when the screws were attached. The 1/2″ forstner bit was missing so I used a 1/2″ brad tip bit to put a recess on the face which will get plugged by some 1/2″ walnut dowel once mounted on the wall.
Finally a finish of shellac was applied after wiping the whole thing down with a microfiber cloth to remove the dust. A few coats of shellac with some sanding before the last coat gives it a nice amber finish which looks good on oak and walnut. The completed project is shown below.